
With our email channel, you can answer emails directly in your Userlike Message Center, keeping most of your support requests in the same place (webchat, social media channels and email).
Integration
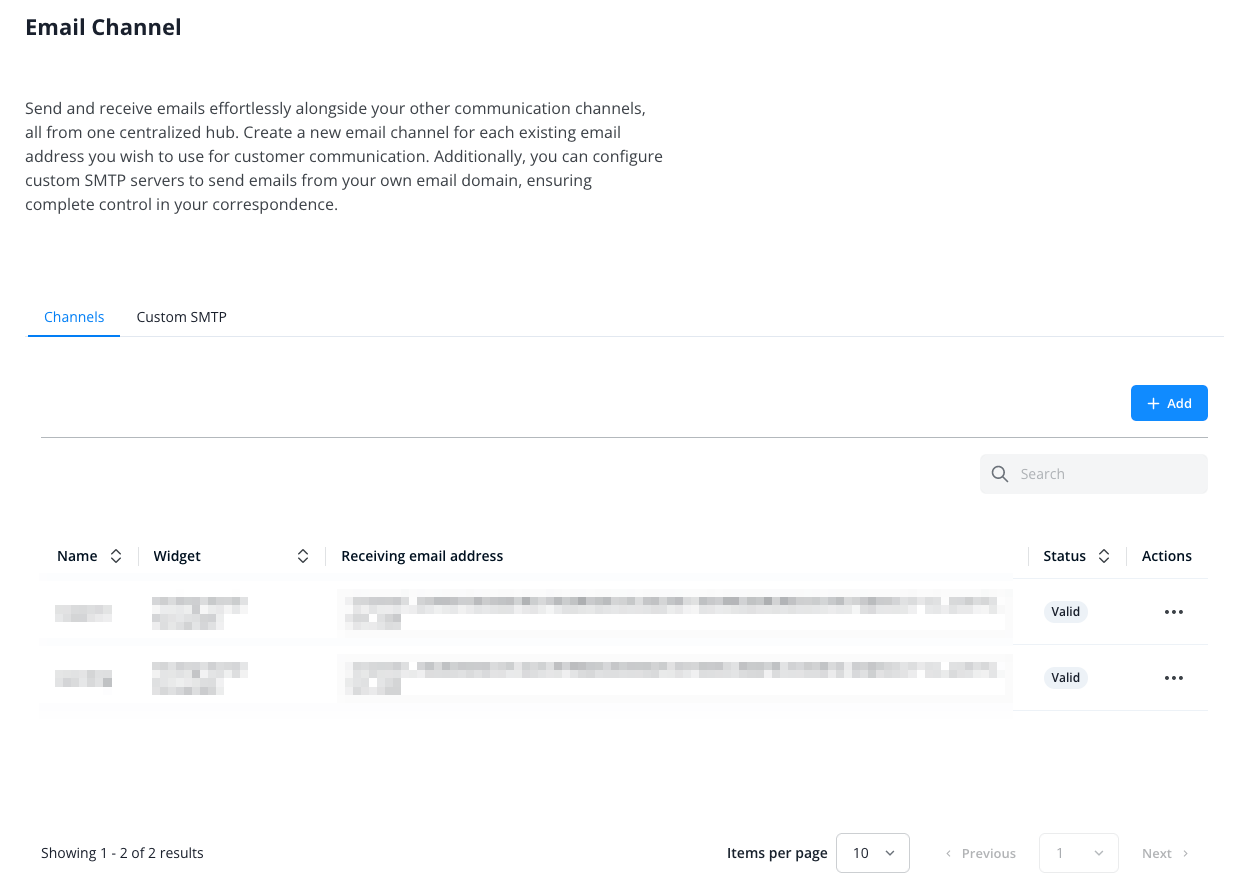
Head to Channels > Email and click on the blue “Add” Button.
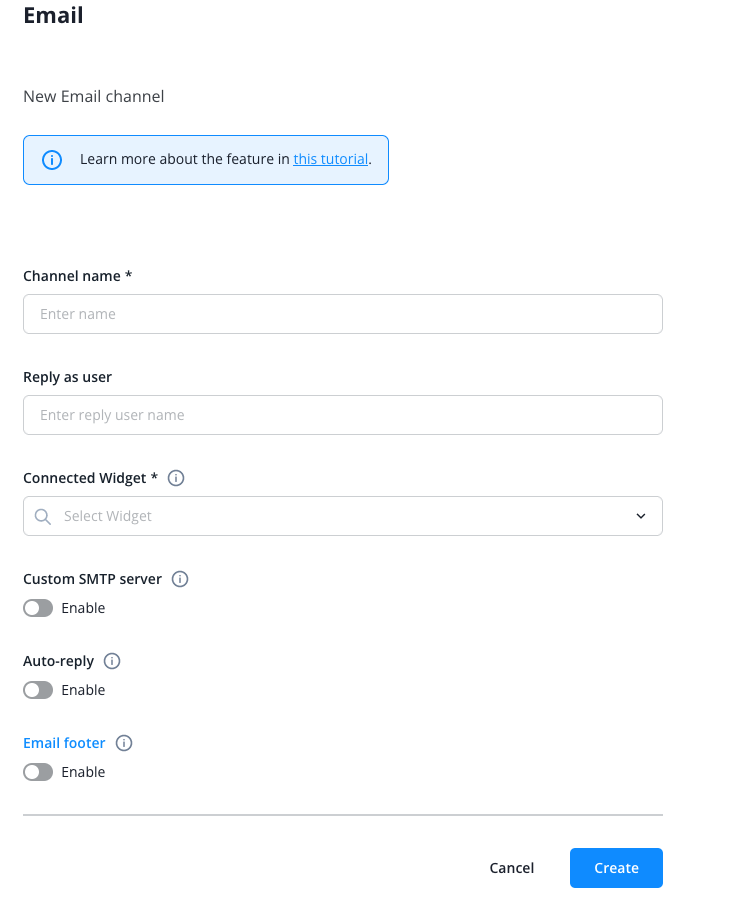
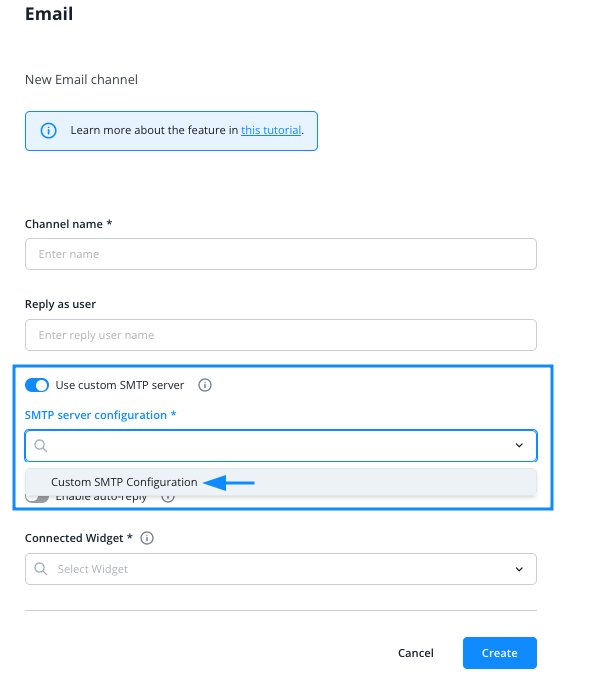
Give your new channel a name, then enter a reply name that will be displayed publicly as your sender’s name.
Choose if you want to send your replies through your own SMTP server or Userlike’s server.
More information on SMTP server configurations can be found here.
Select the widget you want to connect the channel to.
If you prefer, activate auto-reply. This will send out an automated reply to incoming messages.
You can also set an email footer.
After completing the configuration, click the blue “Create” button.
The channel is created and will be displayed in the channel overview.
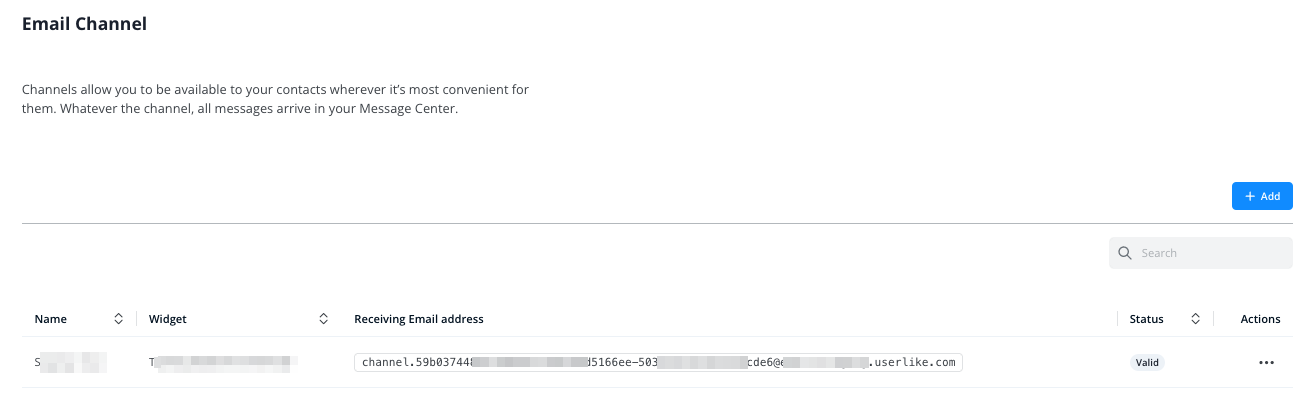
Set your own email server or email service (like Gmail) to redirect incoming email to the “Receiving email address” we provide.
Only that way they will show up in your Userlike Message Center!
Emails sent to your email address (for example your support email address) will then be redirected to the receiving email address, and ultimately, to your Userlike Message Center.
We do not recommend to use an email-address, that is also used by an operator. If you do so, operators may recieve a high number of notification emails. These unread message notifications are interpreted as unread messages in the email channel conversation, further unread message notifications are triggered and so on…
SMTP Configuration
You can use your own SMTP Configuration to set your own reply email address. This way emails sent out by your channel are no longer sent by our long and cryptic email address, but by your company email address instead (for example support@domain.com)
Please note that the SMTP configuration only applies to outgoing emails from the Userlike Message Center.
The cryptic email address from Userlike is still used as the reply email address so that it can be assigned to the corresponding conversation in the Userlike Message Center.
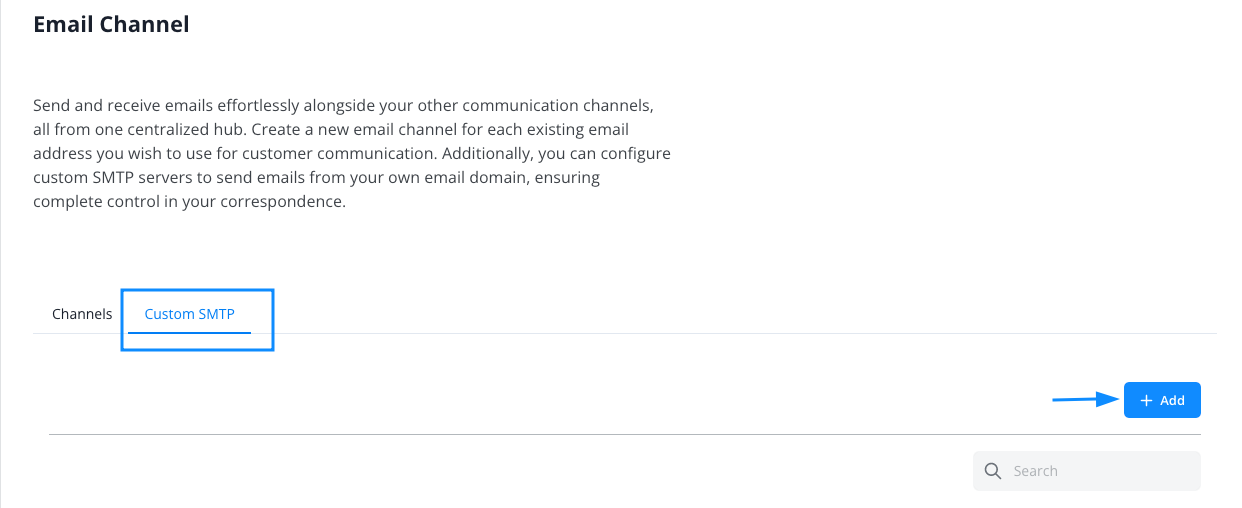
To start, head to Channels > Email > Custom SMTP.
Click the blue “+ Add” button.
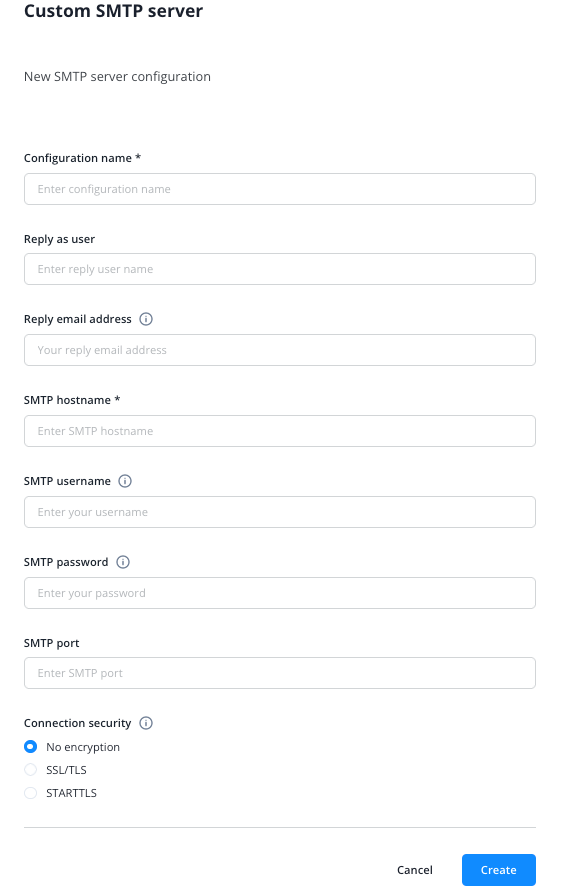
Fill in the required data for your custom SMTP server configuration.
Give it an internal name, a reply user and reply email address. It must be a valid email address the supplied credentials have access to
Then use the SMTP configuration data of your own email server or email provider (like Gmail).
- SMTP hostname
- SMTP username
- SMTP password
- SMTP port
- Encryption method
If you have your own email server, your IT department should be able to provide the relevant data to you.
Although we perform an initial to see if the credentials are valid, we still recommend to send a test email each time you change the configuration.
Please make sure you meet the specific email providers security measurements before setting up a custom SMTP configuration.
For example Gmail requires an active 2-factor-authentication and a specific app-password for SMTP to work.
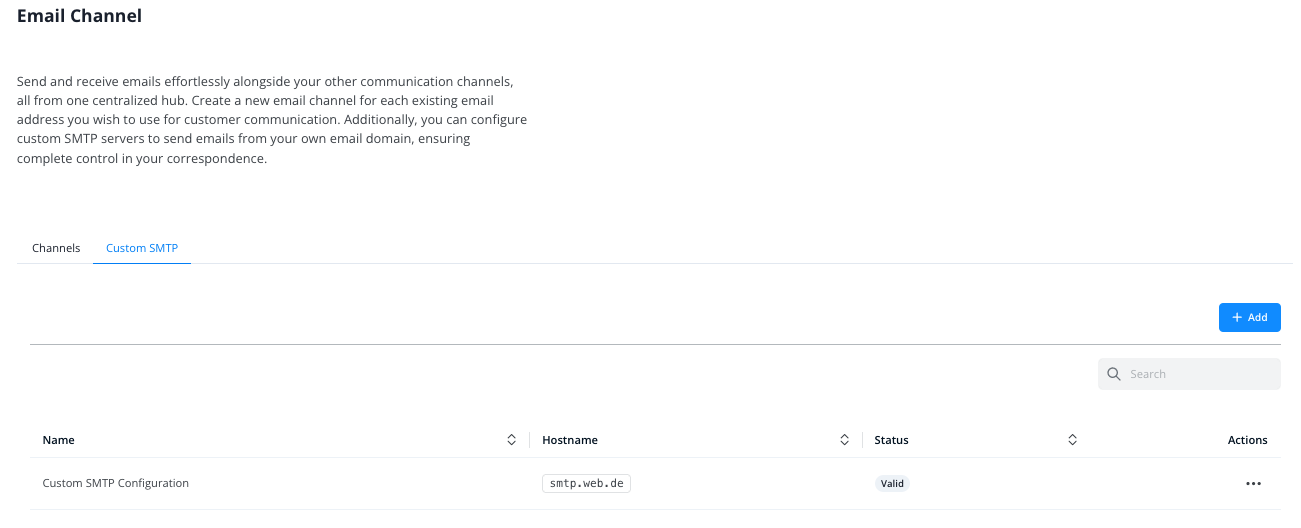
After saving, the Custom SMTP Configuration shows up in the Custom SMTP List:
Now, when creating or editing an email channel as shown above, after activating the custom SMTP server, you’ll find the saved configuration in the dropdown:
Working with the Email Channel
With an email channel, you’ll receive emails in the Userlike Message Center along with web chats or conversations via other channels such as WhatsApp or Telegram.
Your customers send you an email that you’ll respond to in the Userlike Message Center. Contacts then receive your reply as an email within their inbox.
Unlike in web-chats, pressing the ENTER key will not send the message/email to the customer but instead adds a line break. With this, you are able to structure your answer exactly as you would with an email. Of course, formatting options are also available.
Your answer will be sent by clicking the send button.
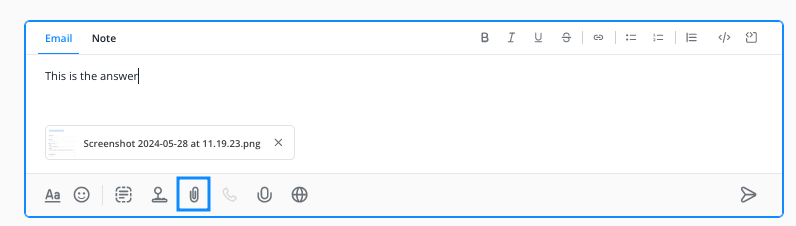
Sending Emails with attachments
If you want to send out an email with attachments, select the attachment symbol, then add your attachments from your local drive. It will then be added to the attachment list below the message box and sent out together with the text. The recipient will receive your message as an email with the file(s) attached.
Email footer
Email footers can be set in the channel settings.
The text you specify will automatically be added to the bottom of your answer while working on an email conversation in Userlike’s Message Center.
The footer will not be added to the auto-reply (if activated in the channel settings)
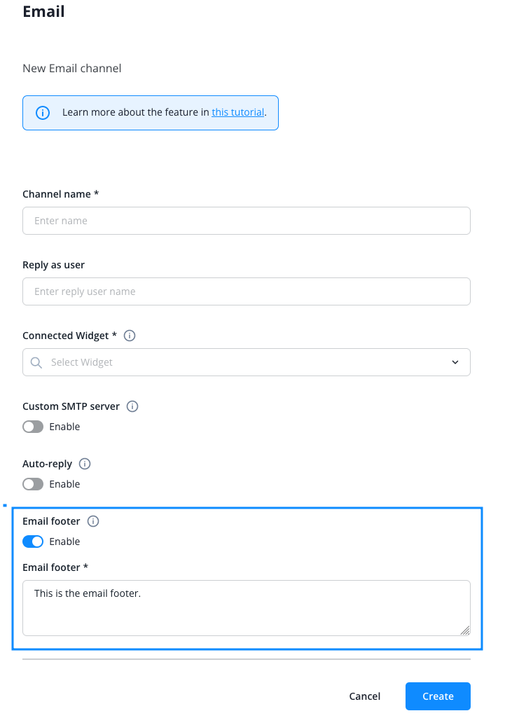
While the email footer will be added for all operators working on the email channel, the email signature is operator specific. Read more on that below.
Signature
You can add an email signature to each operator profile. To do this, select the operator in question from the operator overview and then switch to the "Email" tab.
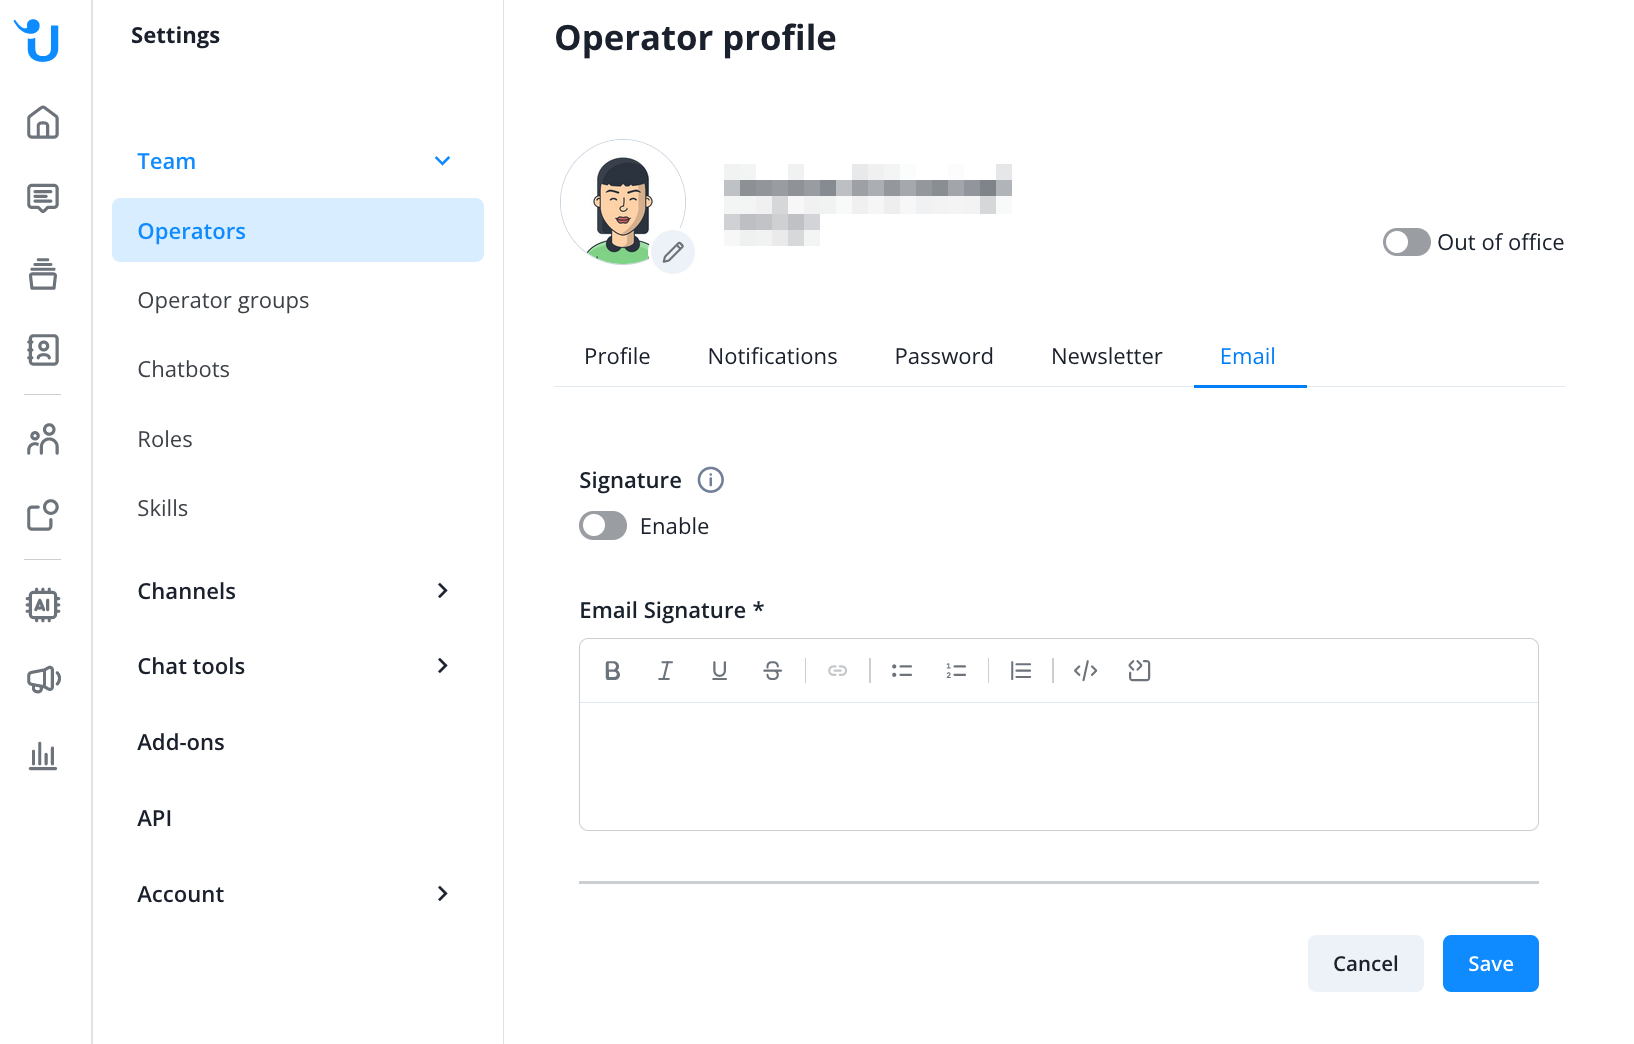
The signature can also be set up by the operator, if their role has sufficient rights to do so. Add a signature by clicking on the profile picture at the bottom left, then on "View profile", then finally on the "Email" tab.
If the signature is activated for an operator profile, it will automatically be attached to messages sent out via one of your connected email channels.