
Introduction
Google Tag Manager allows you to integrate Userlike into your website in a flexible way by using tags and triggers. Get your Tag Manager account here.
Your advantages when using the Tag Manager with Userlike:
- Load Widgets with different behavior or language based on the domain or URL they’re used on.
- Change your Widget setup without deploying your website, so that changes can be made without the help of the IT department.
Follow the steps below to connect Google Tag Manager with Userlike.
Step 1
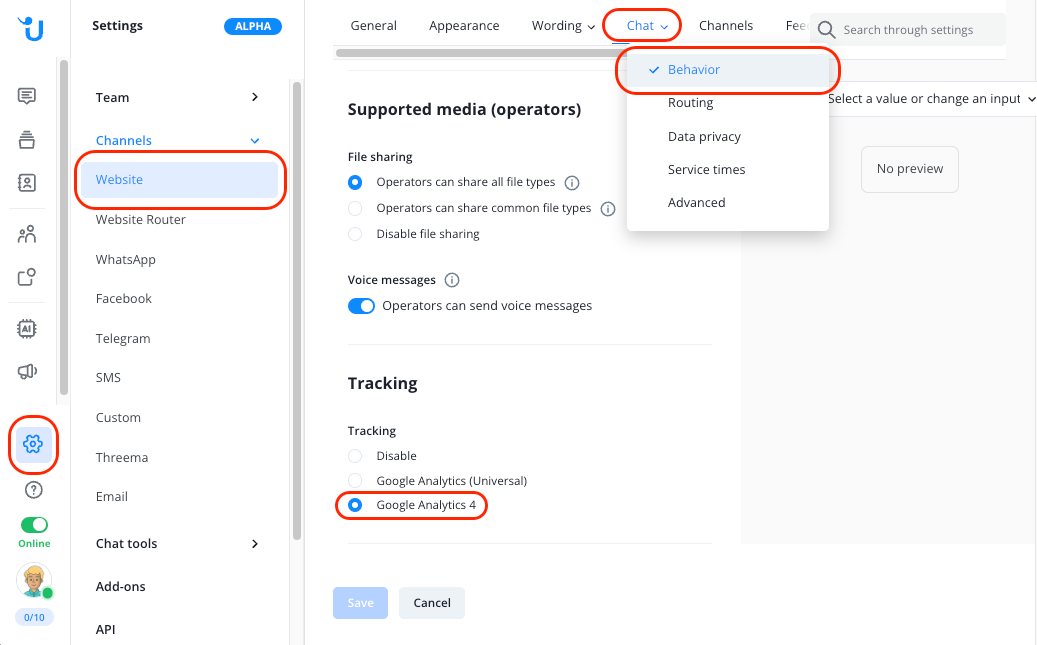
Make sure you have enabled “Google Analytics 4” in in the widget settings under Chat > Behavior > Tracking.
Step 2
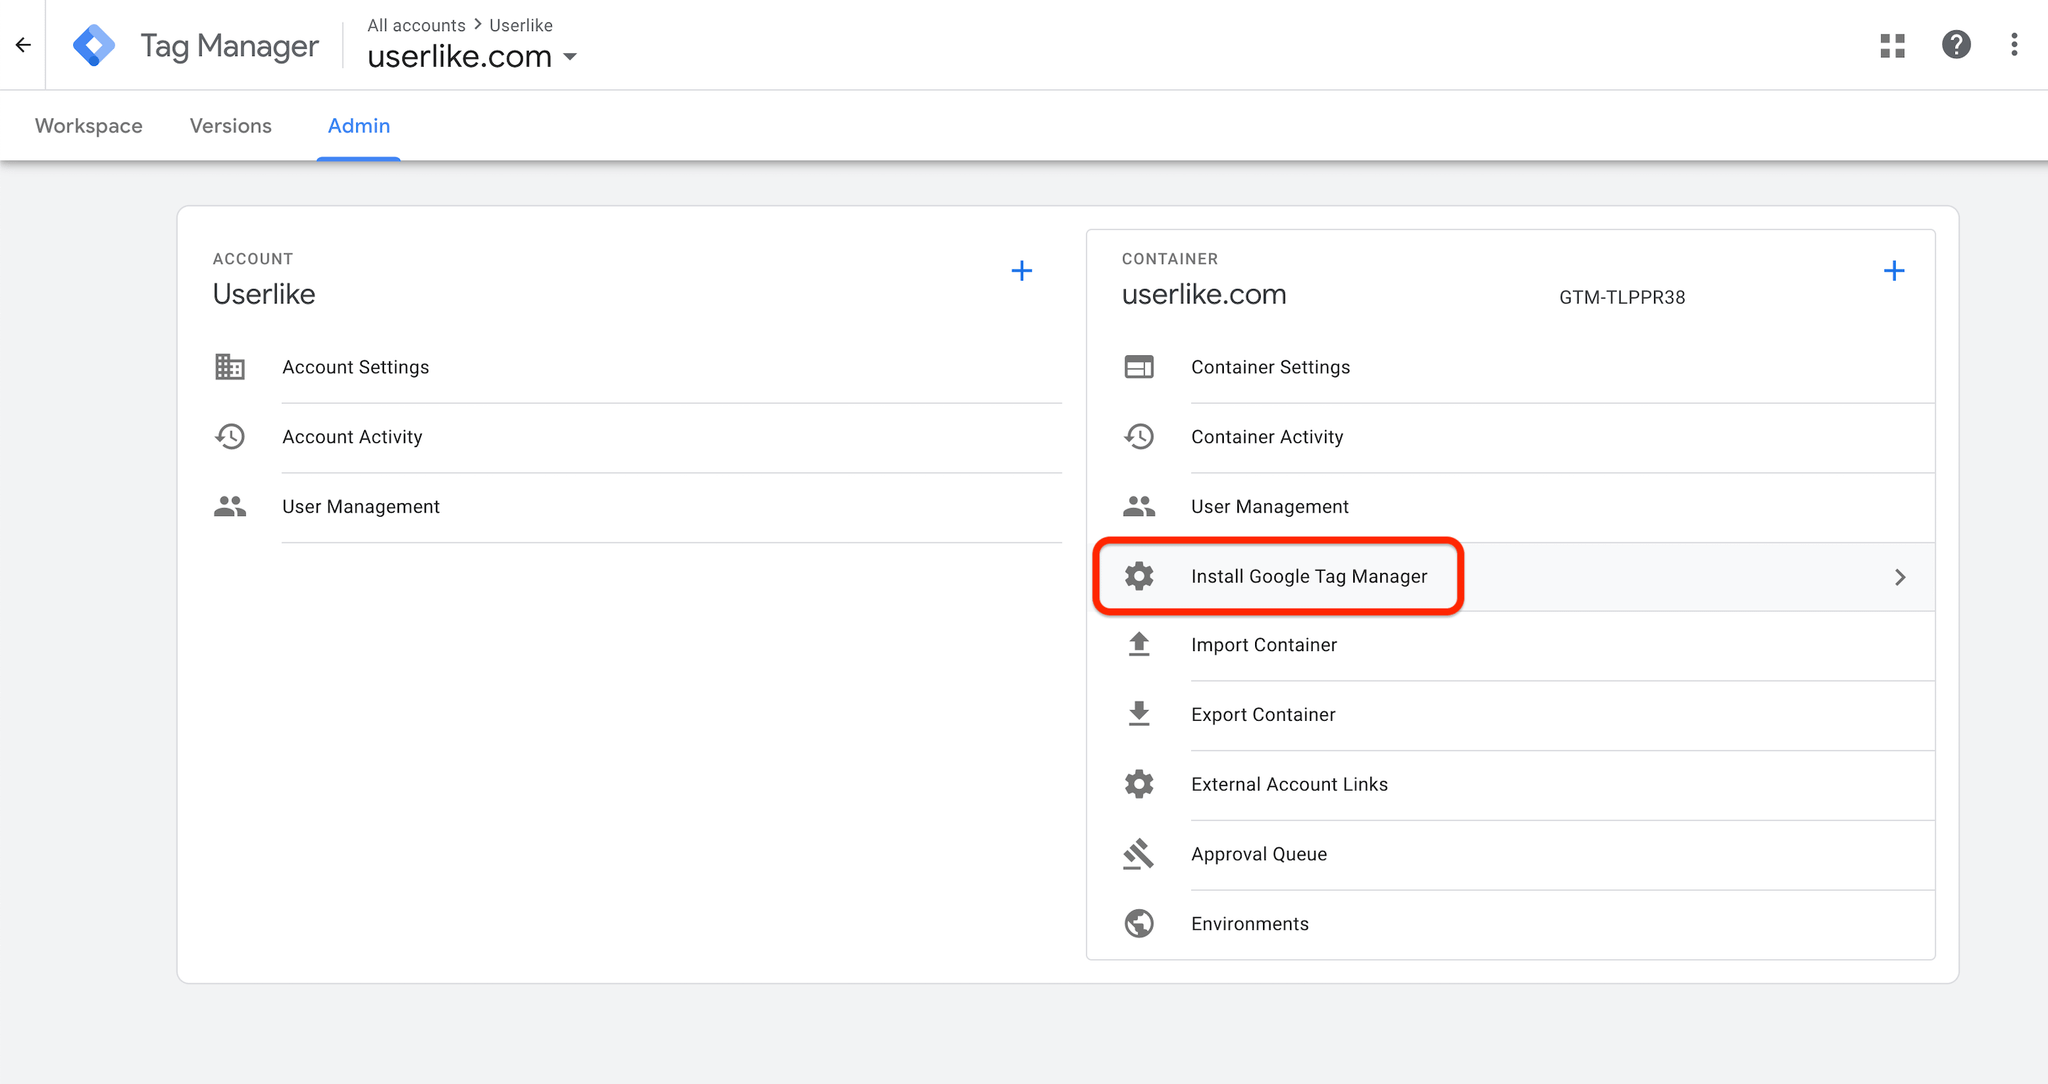
Once you’ve set up your Tag Manager account, create or select a container for your website and click Install to view your JavaScript code.
Step 3
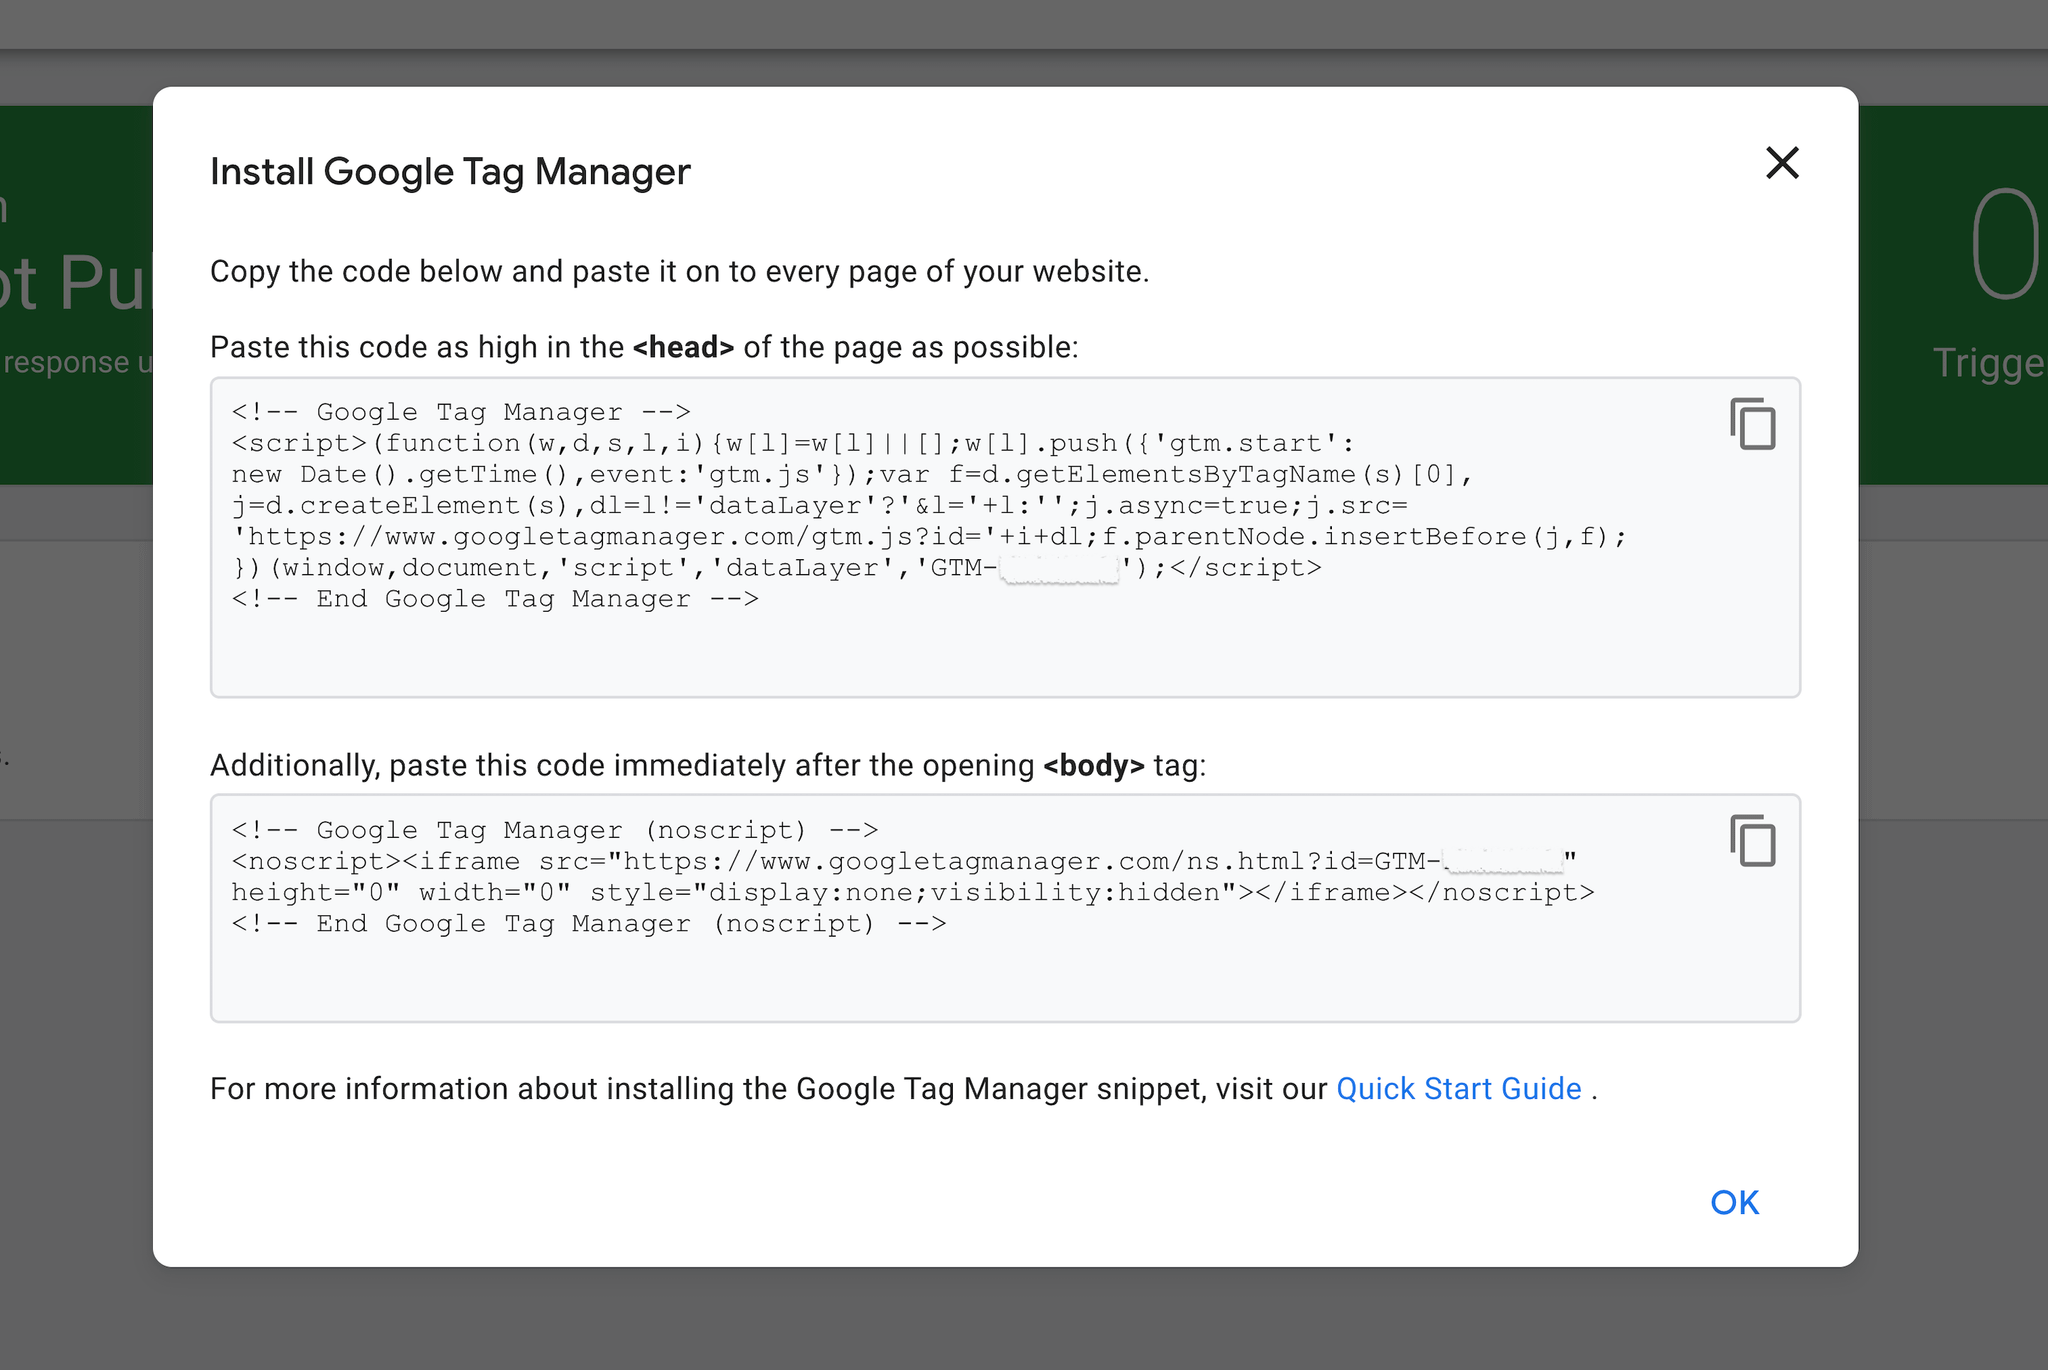
Grab the code and implement it on your website. For details, please refer to Google’s documentation.
Step 4
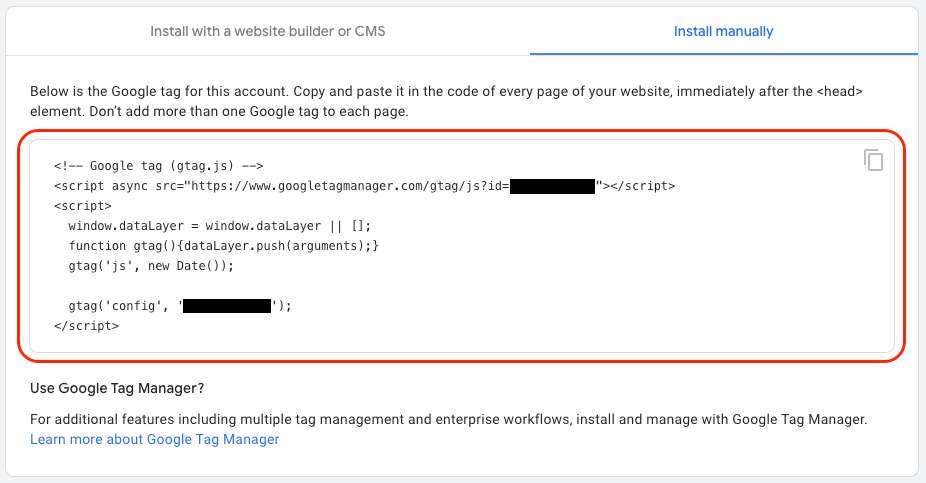
In your Google Analytics account go to Admin > Data collection and modification > Data streams open your data stream and click on View tag instructions.
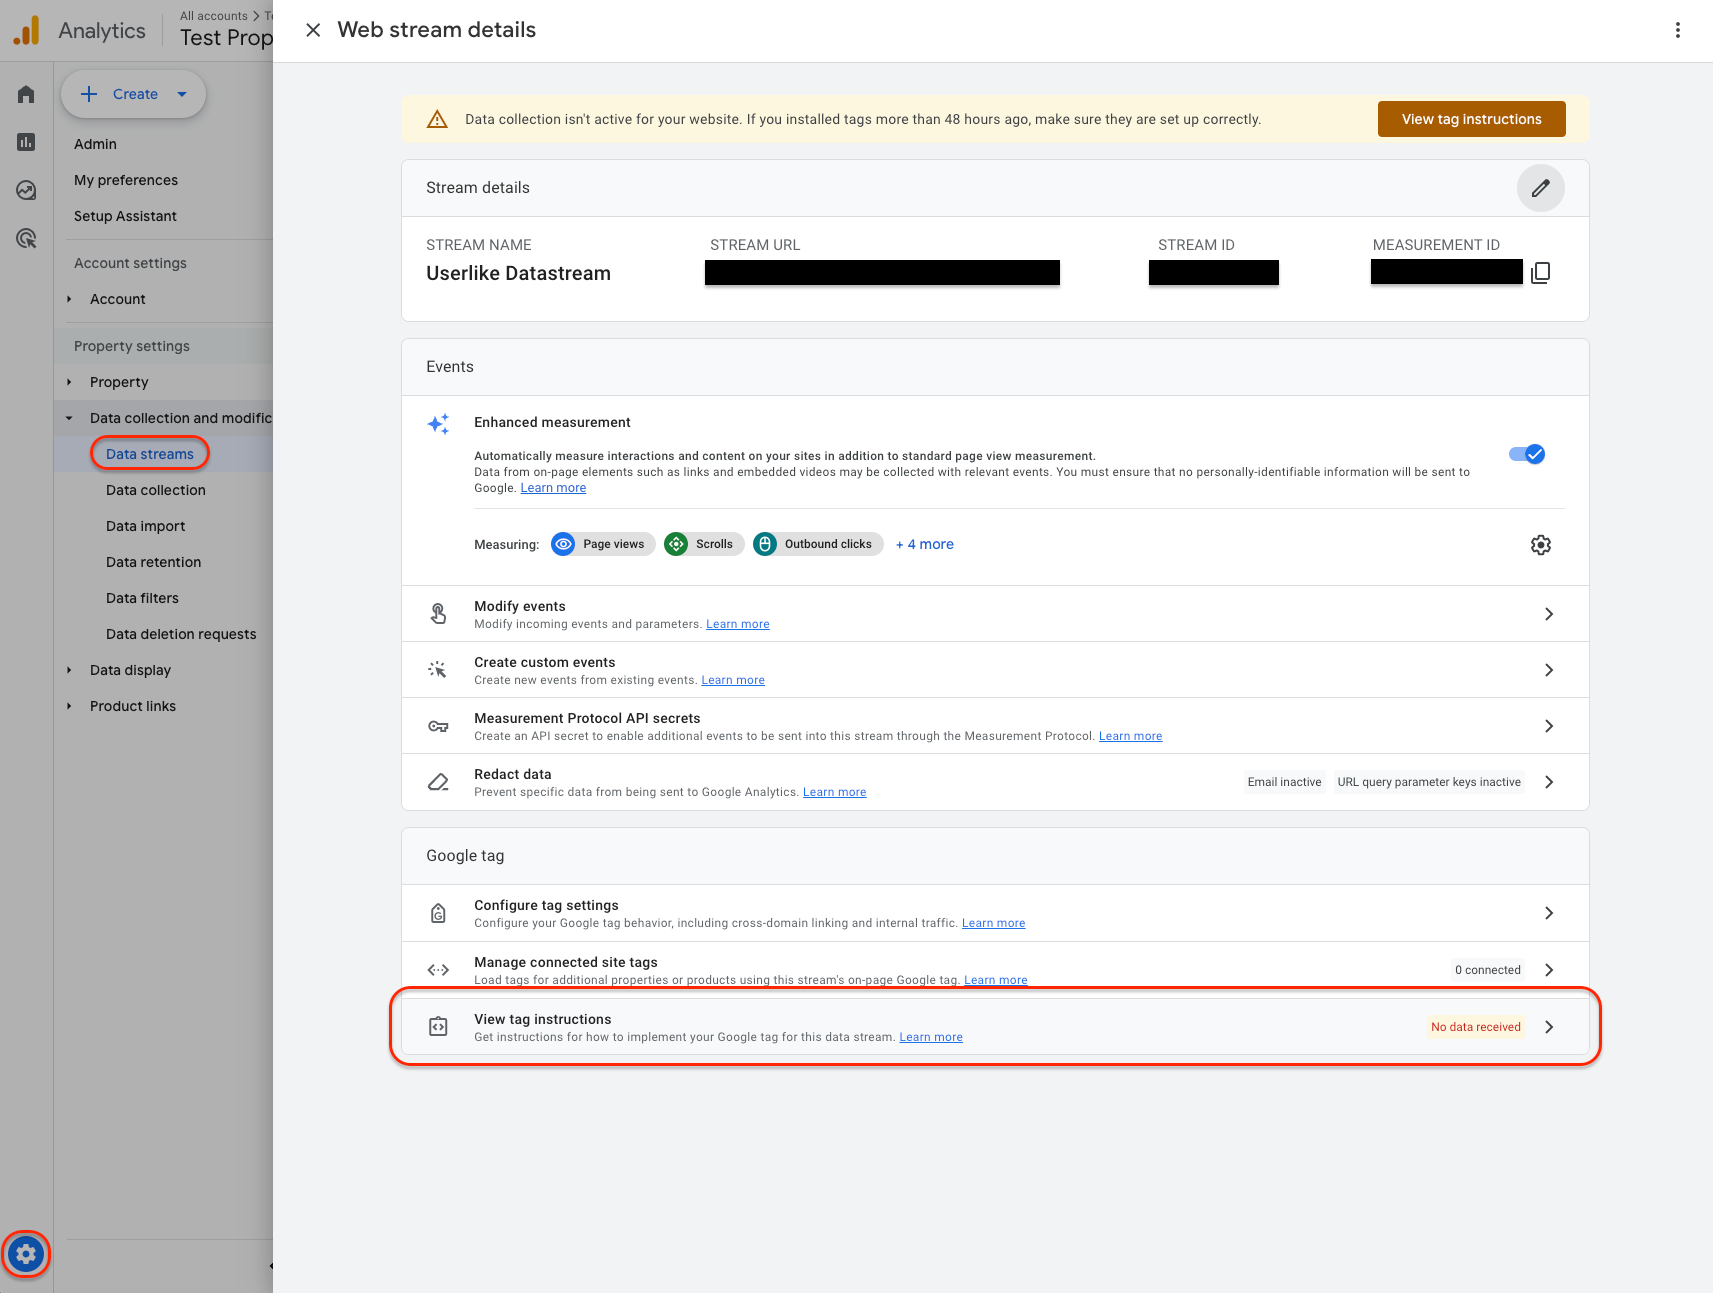
Then select the Install manually tab and copy the script tag (Google tag).
Step 5
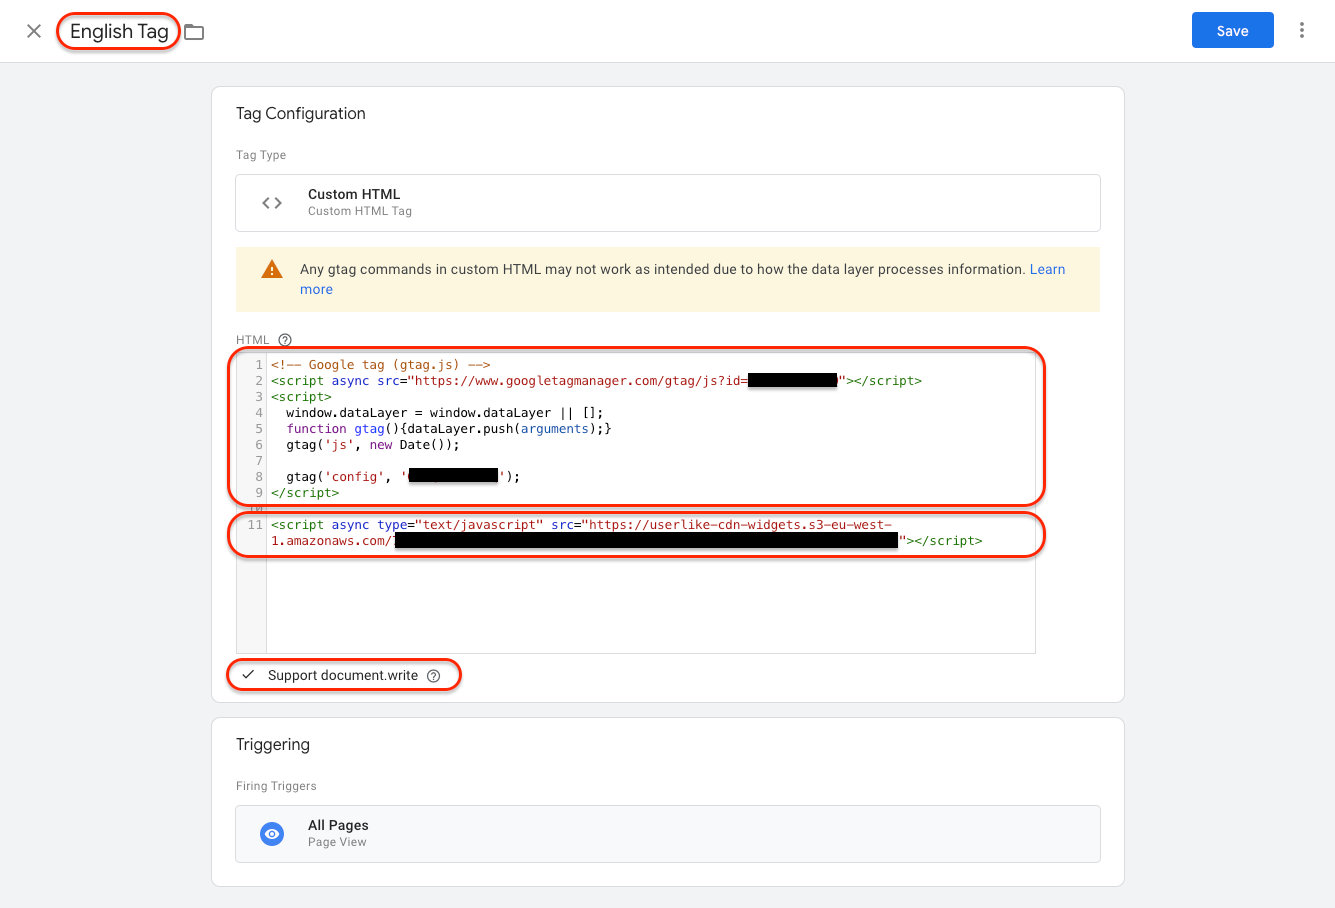
Create a new tag with the tag type “Custom HTML”.

Step 6
Name your tag and paste your Google tag and your Userlike Widget code in the order as pictured in the following image.
Make sure to check the option Support document.write.
You find your Userlike Widget code in the Widget’s settings under Install > JavaScript Widget code.
To avoid CSS conflicts with the chat client, we advise you not to use
iframe { !important } in your CSS. Better be more specific and exclude the Userlike chat client by using iframe:not(.userlike) { !important }.Step 7
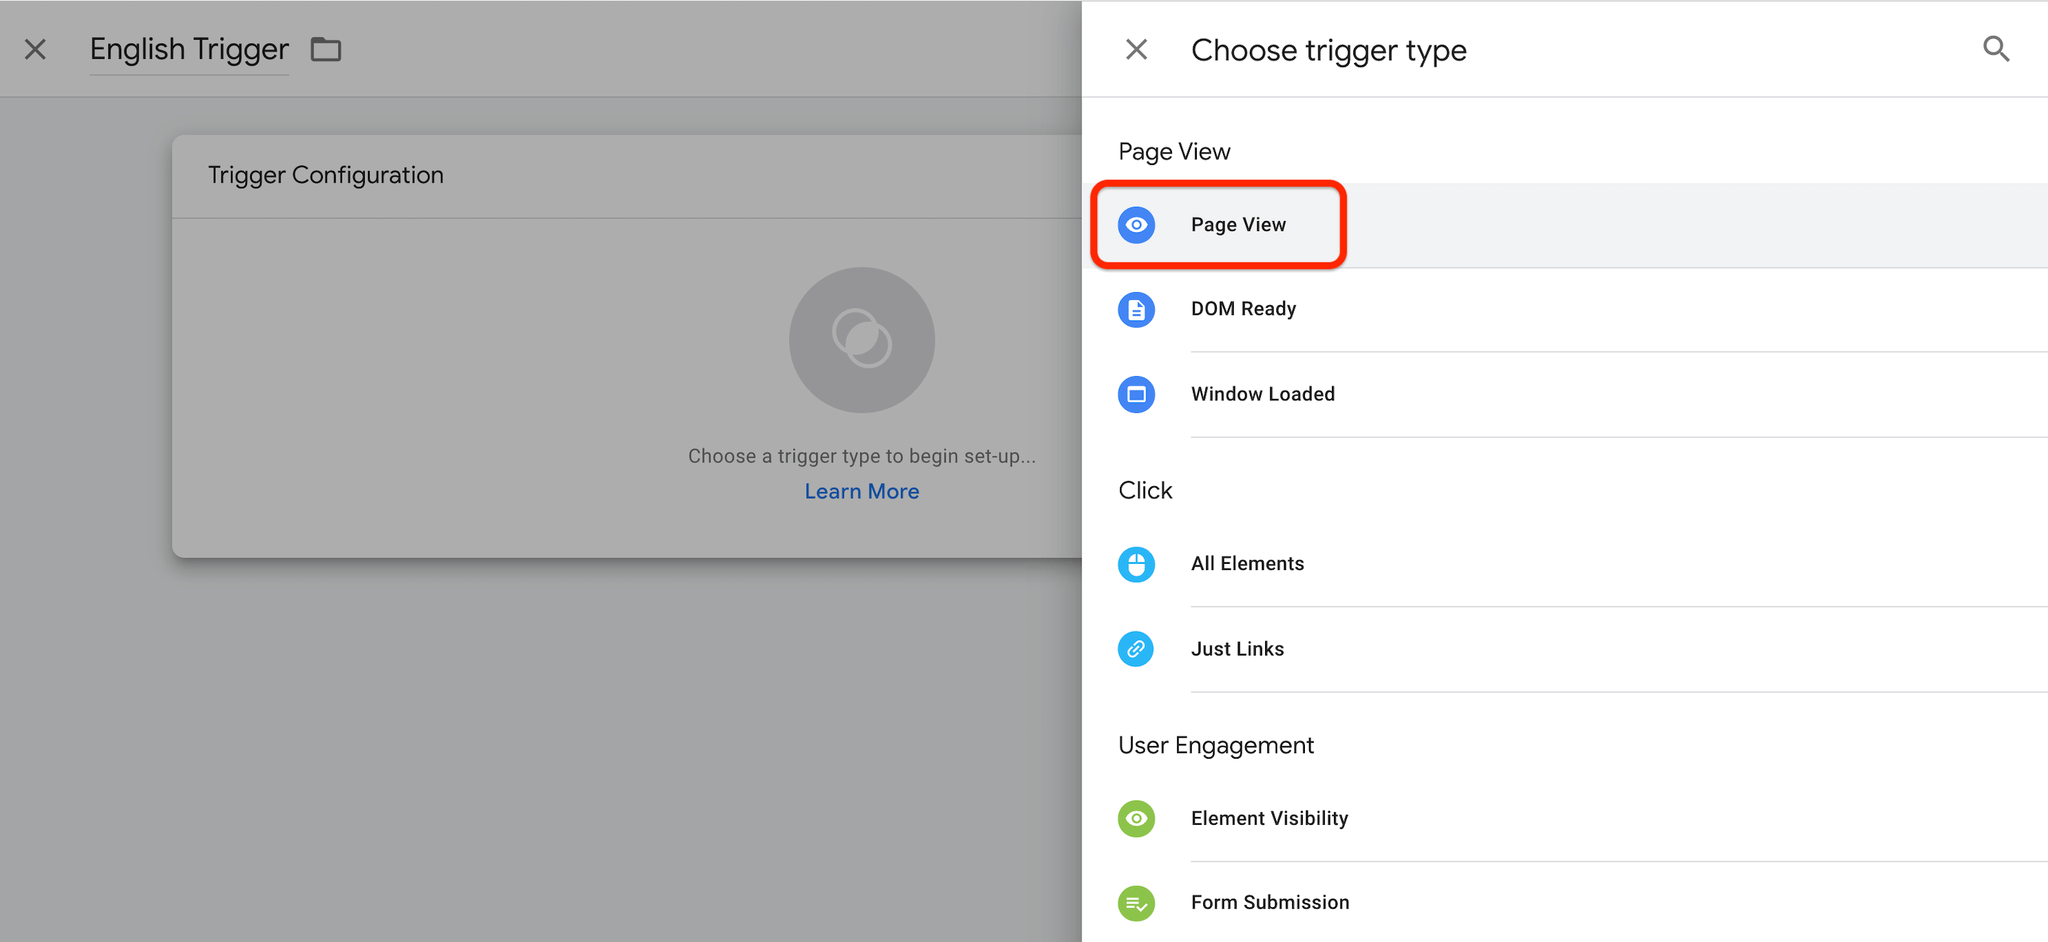
Add a trigger to the tag. For example, if you want your Widget to load when a visitor visits a certain page, select the trigger type “Page View”.
Step 8
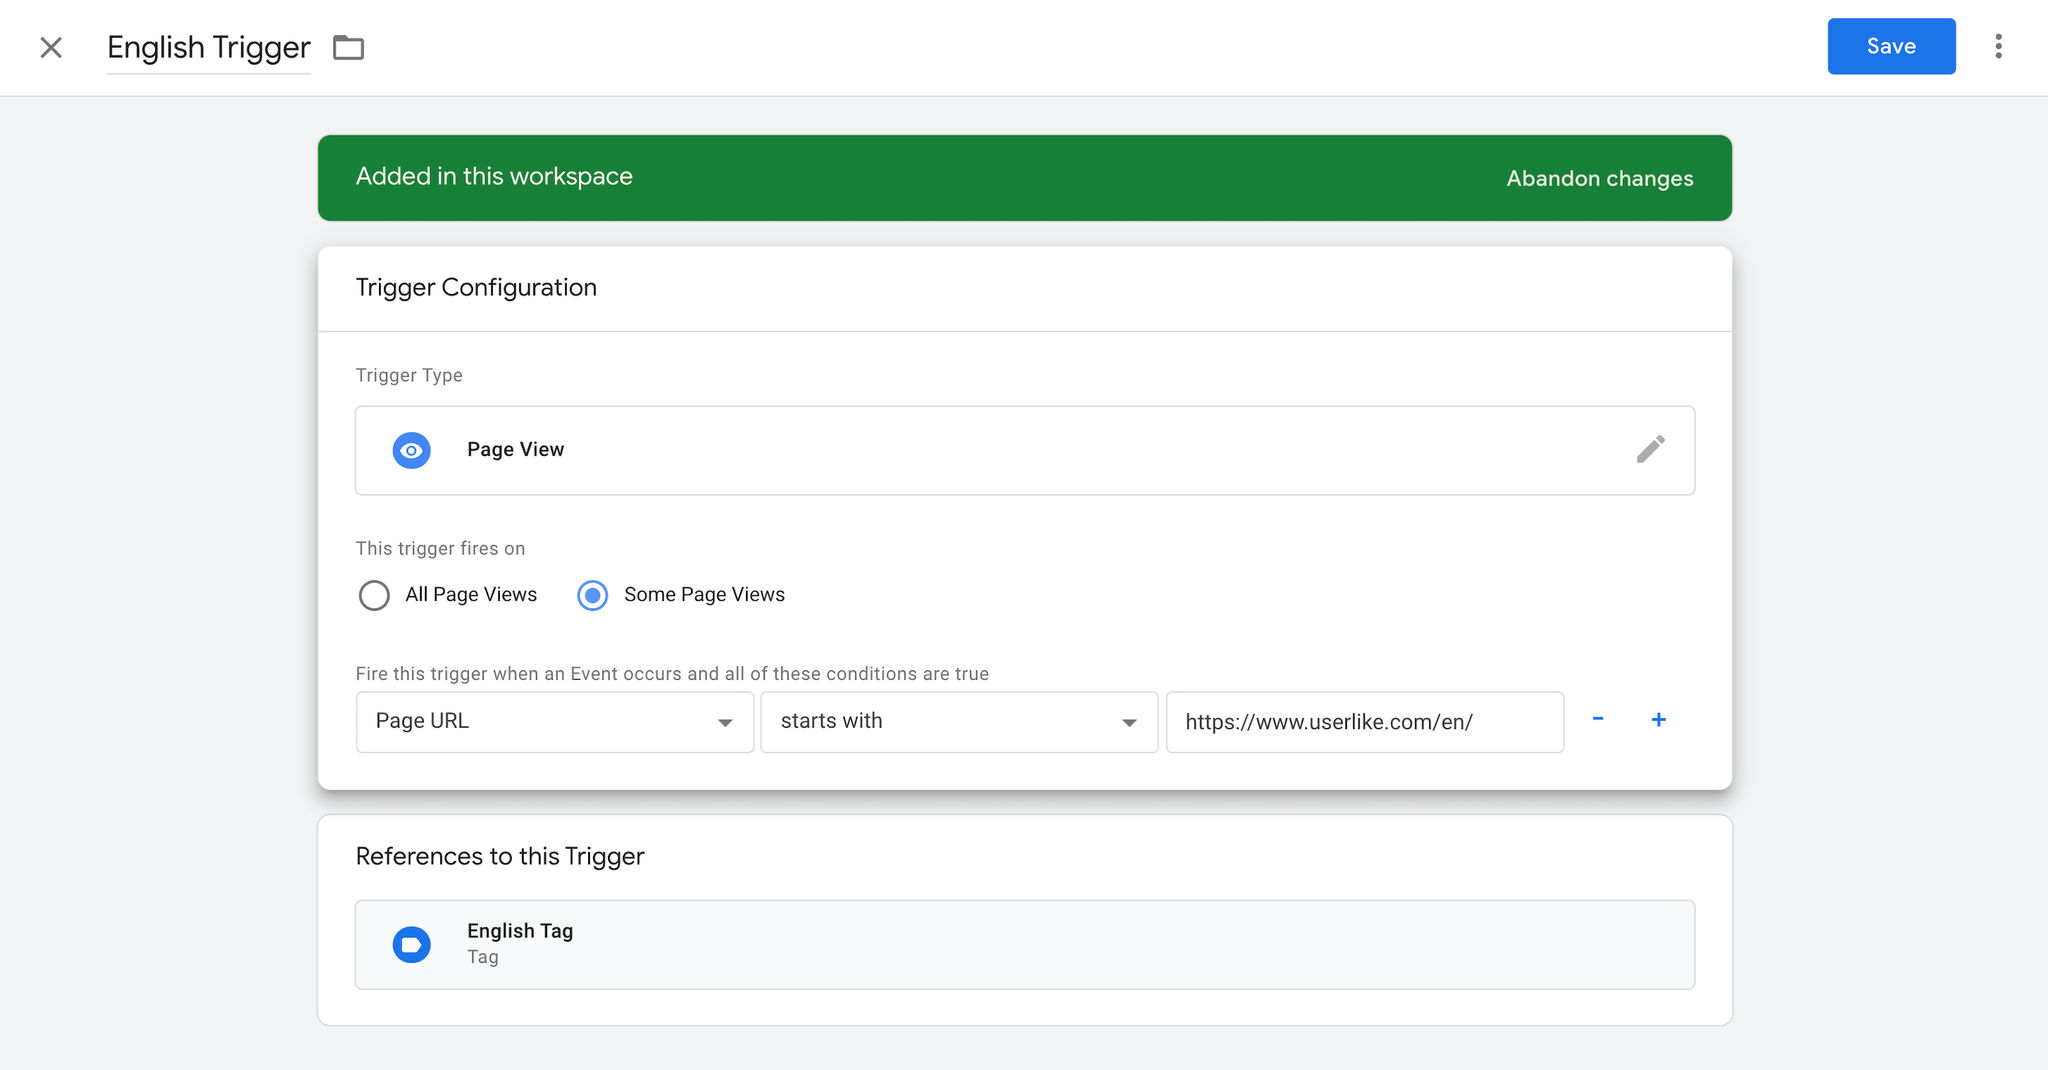
Configure the trigger to your requirements with the conditions provided for each trigger type. In our example, the Widget would only load on our English pages.
Step 9
Submit and publish your setup, then you’re ready to use Userlike with Google Tag Manager.