
Settings

Each answer has the following settings:
- Categories - this setting determines in which folders/categories (from your knowledge base) this answer will be visible. (The categories also allow you to influence which modules have access to which answer, which we will explain further down below.) If it makes sense, you could add the same question to multiple folders/categories.
- Date - you can decide if the answer will be displayed only for a certain period of time. A start and end date needs to be set.
- Visibility: The visibilities have no direct impact (except Draft) on the display of the answers, but allow the admin to "categorize" answers according to the desired visibility. The visibilities can then be selected in the individual modules and are one of the defining characteristics that the chatbot has access to. We recommend understanding the individual visibilities as follows:
- Public: The answer is visible to your customers.
- Internal: The answer is only visible in internal modules.
- Instruction: The answer is displayed only for internal employees as a work instruction.
- Draft: The answer is not visible in any module and must still be set to public.
Once they’re created, all answers are marked as draft. In order for them to be displayed, the visibility must be changed to “Public”!
Content
To start creating content for your answer, click in the text field so that the pilcrow icon (¶) appears on the left side. With this icon you can open a menu to select different elements. Choose between text, multimedia and download elements. For example, you can write a text and hit "Enter" to create more elements.

Explanation of the element symbols:
1: Text
2: Headline
3: Sub-Headline
4: List
5: Note
6: Link
7: Image
8: Video
9: Source Code
10: Download
11: Condition: The condition element allows you to create more complex answers with multiple branches. Find more information here.
12: Shortcut: Interconnect question/answer entries in the knowledge base so that answers to related questions can be shared. Type in the question from your knowledge base and make sure that the text matches exactly.
13: Workflows: Add one of you previously created Workflows or add a new one.
14: Navigate: With this command it is possible to refer to a specific URL of your own website. The desired URL is entered in the field. If the command is now executed, the chatbot forwards the user to the stored URL.
15: Agent forwarding: Let the chatbot forward your contacts to a an agent, an operator group or one of your skill sets. You can also choose to “Unassign conversation when no Operator available”
16: Dispatch: You can forward the chatbot conversation to one of your activated add-ons, or send the conversation via email to either an operator or the customer.
17: Restart chat
18: End chat
19: Conversation information update: The subject and language of the conversation are updated here. You can also add a note, which can then be seen in the conversation details in the Userlike Message Center.
20: Contact information update: This element can be used to update some of the contact data stored in the Userlike Message Center. The following contact information fields can be updated:
There is a dedicated engine that checks for errors in the answers and shows exactly where they occur.
You can find more information by clicking the “?” icon after selecting an element.
Translations to other languages
Each question/answer combination is associated with a specific language.
You have the option to quickly and easily add additional language variants for your questions and answers.
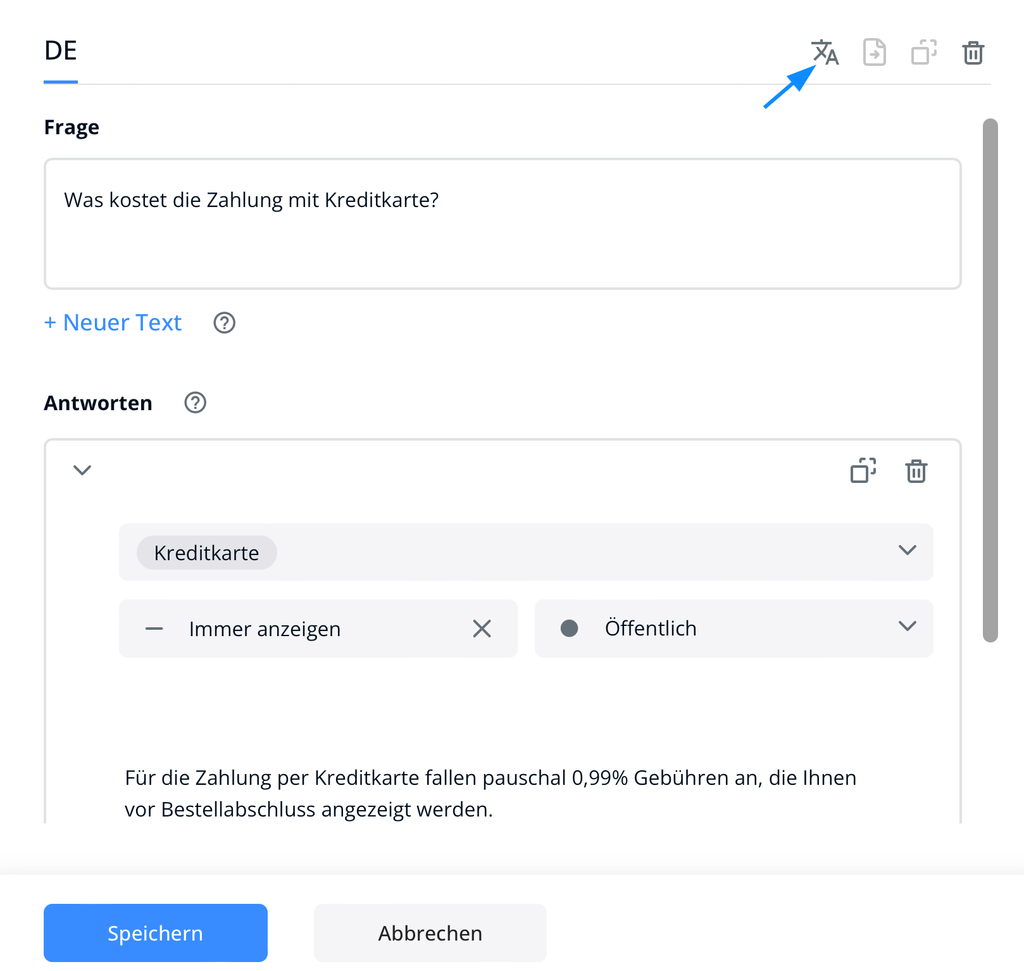
Open the desired question through the left menu. Then use the translation function symbol.
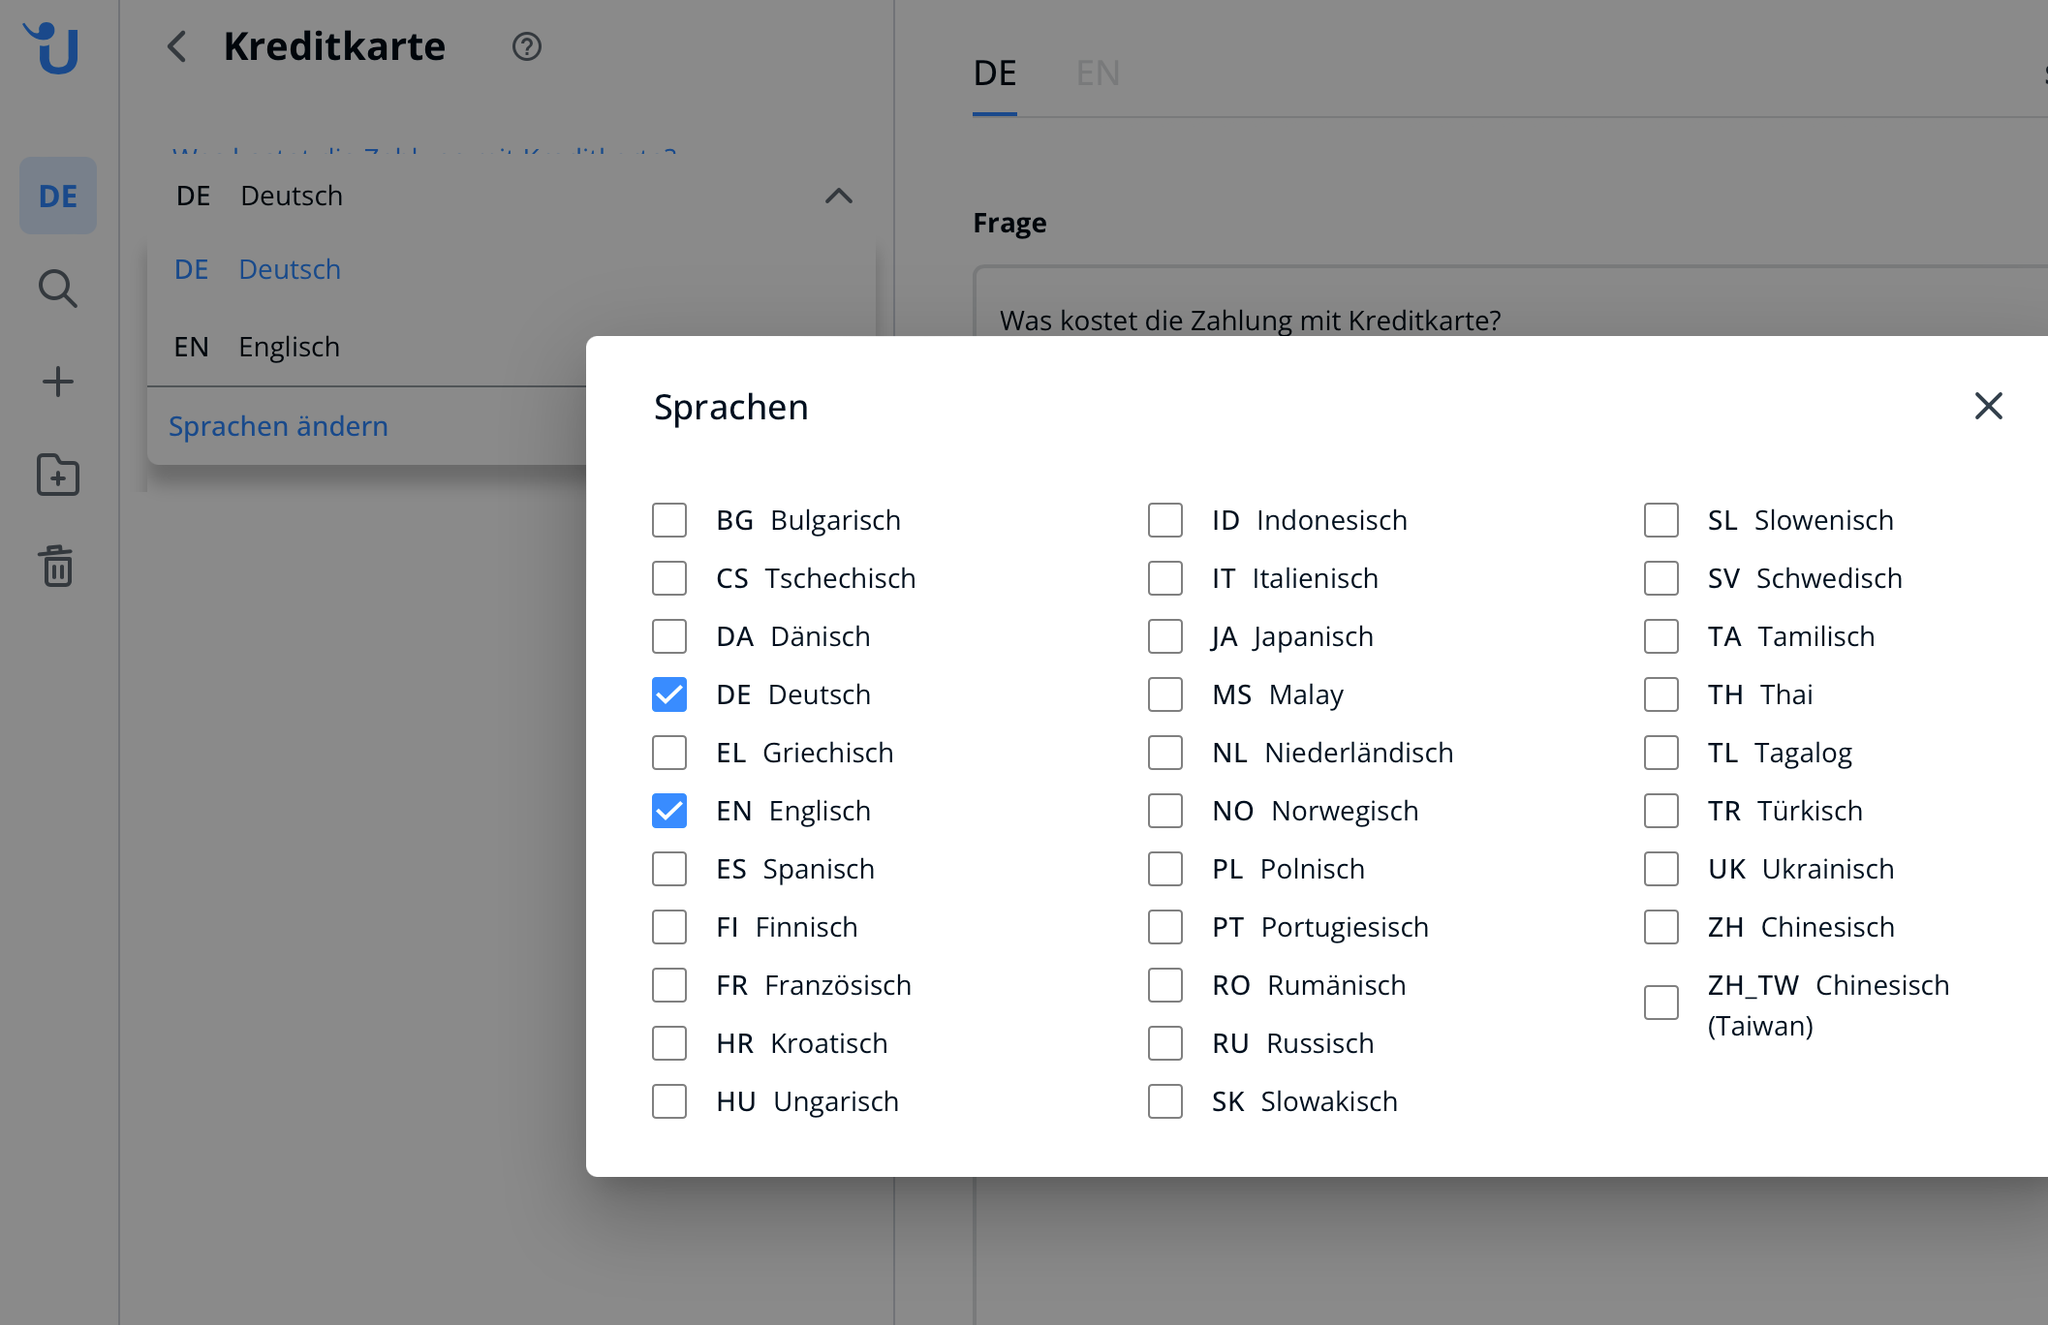
Then, you will be shown the available languages (which you can define through the language selection menu on the left side).
Please select the language into which you want to translate the question/answer combination.
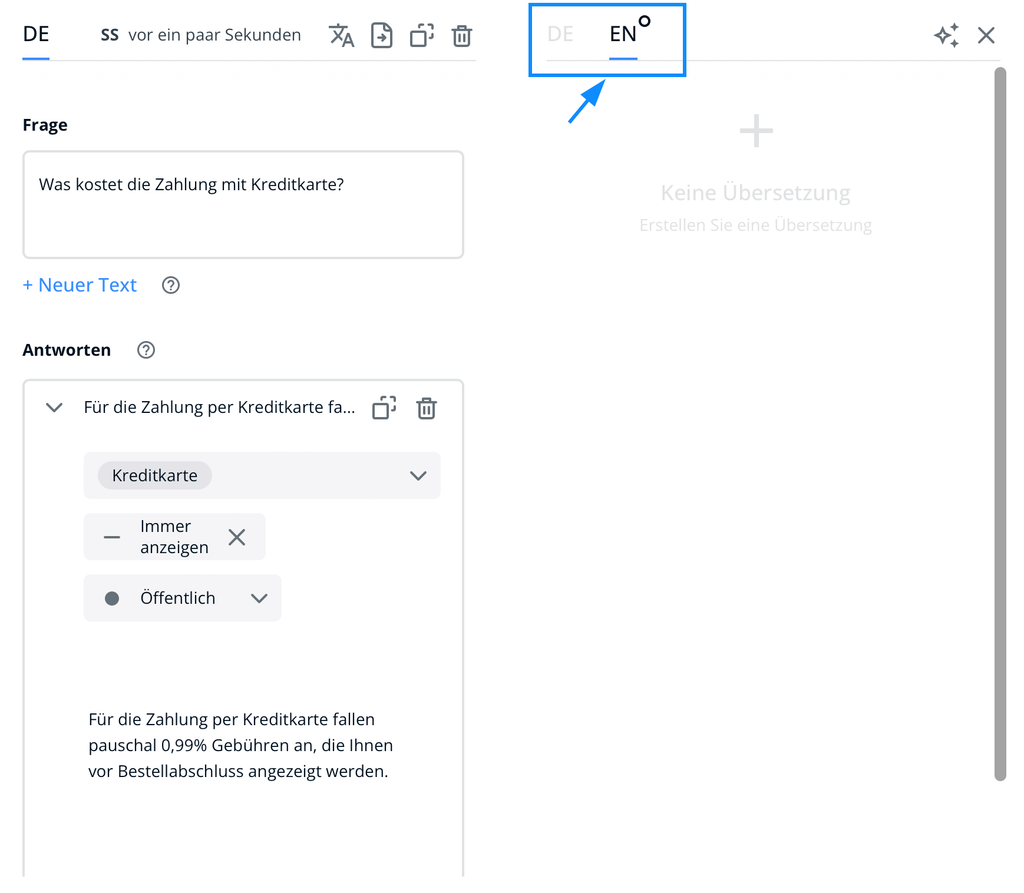
Now you have two options:
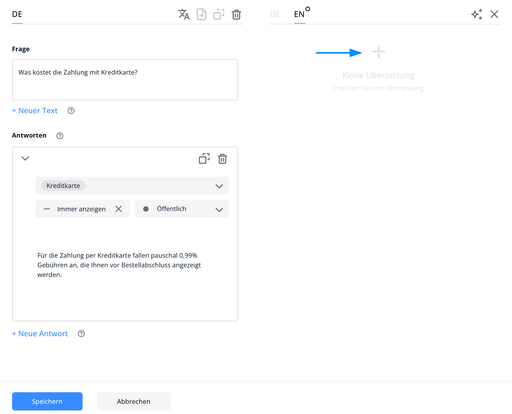
Either click on the + symbol to manually add the translation.
Or click on the star icon to automatically generate the translation using our AI.
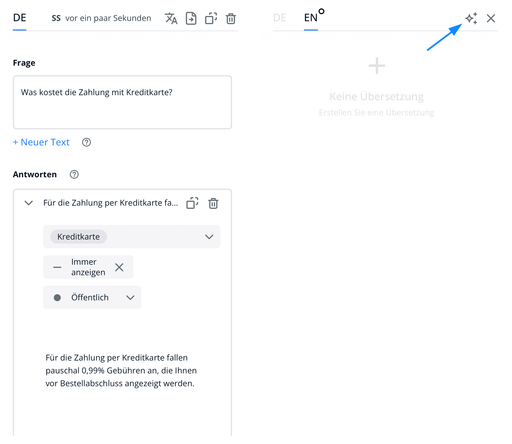
Finally, you just need to save the changes with the blue button.
You will find the new language variants in your menu structure after switching the language using the language selection menu on the left side.
If you later change the contents of an answer, keep in mind that translations to the other languages are not synced automatically.
read this article in English:
https://docs.userlike.com/features/ai-automation-hub/create-a-central-knowledge-base/add-a-new-answer