As your support team grows, you’ll want to connect any contact to your best-suited operator. We offer different routing modes to ensure that your setup always matches your needs.
You can configure each Widget’s routing logic individually by selecting one of these routing modes in their settings under Chat > Routing:
In all modes, conversations will be moved to the Unassigned section of your Message Center’s Inbox if no eligible operator is available. There they are visible only for these operators. Under All conversations, however, they are visible to operators based on their role capabilities.
“Default” routing mode
The “Default” routing mode is simple: You connect a Widget to a specific operator group and any contacts starting a conversation will be routed to one of this group’s operators.
How to set it up
As the name indicates, this is the standard setting for any Widget. By default, the operator group that will receive any conversations is the one connected to the Widget during its creation. Change it in your Widget’s settings under Chat > Routing.
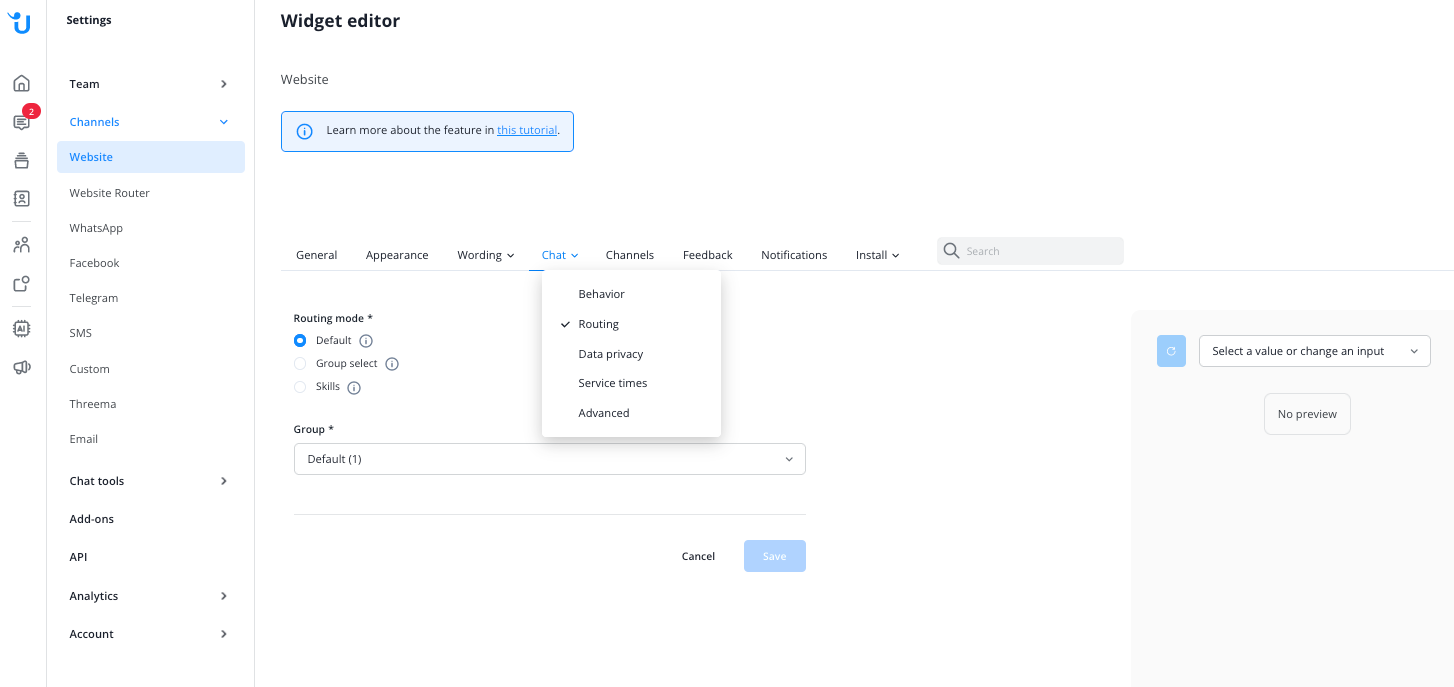
If you want to stick with or switch back to Default mode, ensure that the operator group connected to your Widget contains at least one operator (indicated by the number in parentheses). Otherwise, the Widget will always be in offline mode.
Use cases
The Default routing mode is a good match...
- if you are starting out with a small chat team or are mostly getting questions of similar type.
- if you have a homogeneous chat team. If all your operators are able to give the same quality of support throughout all areas, there is no reason to split them up into groups.
- if you already route contacts to specialized groups through different Widgets on certain parts of your website. Creating, for example, a “Sales” and a “Support” operator group allows you to offer specialized support by connecting them to different Widgets, which you then integrate in different sections of your site.
“Group Select” routing mode
The “Group Select” routing mode works with the same operator/operator group relation as the Default mode, but allows your contacts pick a group from a list that you define before the conversation. This puts them in control of picking the best suited operators for their request.
How to set it up
Enter your Widget’s settings, then go to Chat > Routing.
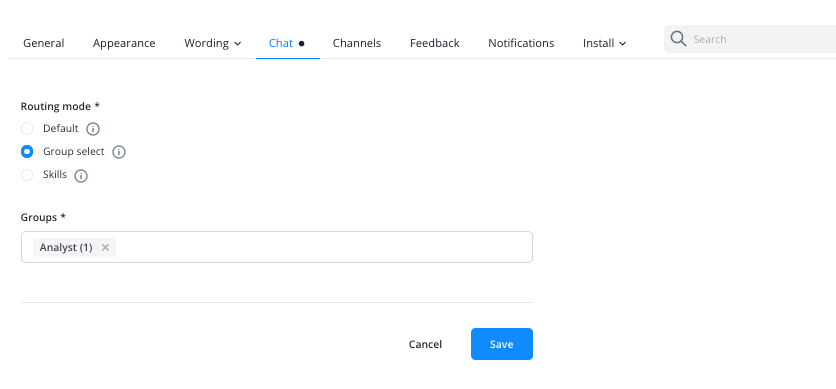
Set the Routing Mode to Group Select. In addition to the Widget’s default group you can now select all other operator groups contacts should be able to choose from when they click to start a new conversation on this Widget. To be displayed, operator groups need to have at least one operator in them.
Once updated, your contacts can now pick a group they prefer talking to before starting a conversation - choosing from the groups you pre-defined.
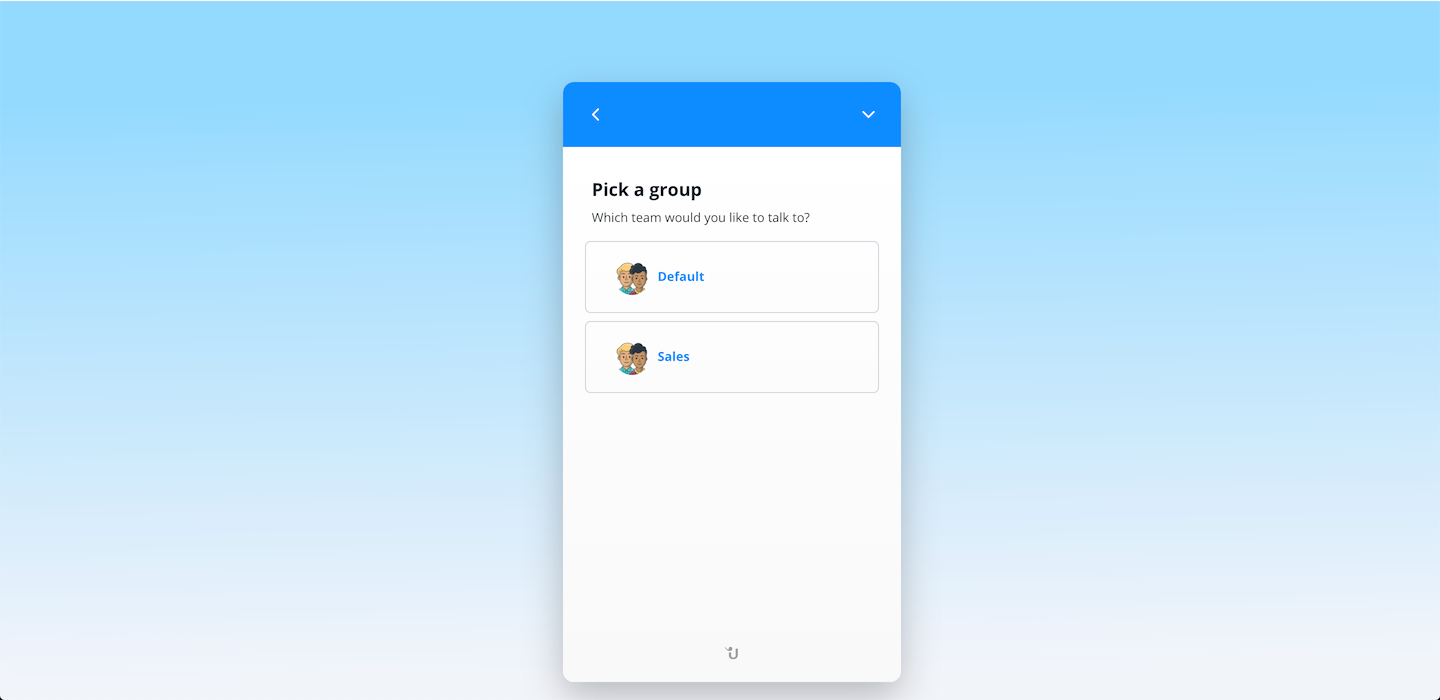
Use cases
The Group Select routing mode is a good match...
- when you have different teams with specialized operators and trust your contacts to know best which is best suitedfor them.
- for sections of your website where visitors are equally likely to need technical support or a sales rep, for example.
“Skills” routing mode
The Skills mode is the most flexible routing mode. Contacts are routed to available operators who possess all skills of at least one of the skill sets you define for this Widget. In other words, you define which skills an operator needs to serve a contact reaching out via a certain Widget. Their group affiliation is not taken into account.
Use cases
In order to use the Skills mode, you first have to create some skills. Go to Team > Skills in your Dashboard’s main navigation:

We provide you with some basic skills to which you can add as many as you need to clearly define your operators’ specializations. The overview shows you which of the existing skills are assigned to your operators and Widgets.
To add a new skill, click Add skill and simply enter a name and a description. Skills can be anything you like or need, from languages spoken to organizational departments. Think of them as simple tags for operators that allow you to match them up with your contact’s needs.
Next, assign the skills to your operators. Go to Team > Operators and enter an operator’s settings. Switch to the SKILLS tab where you find all existing skills and can pick those that apply to the operator:
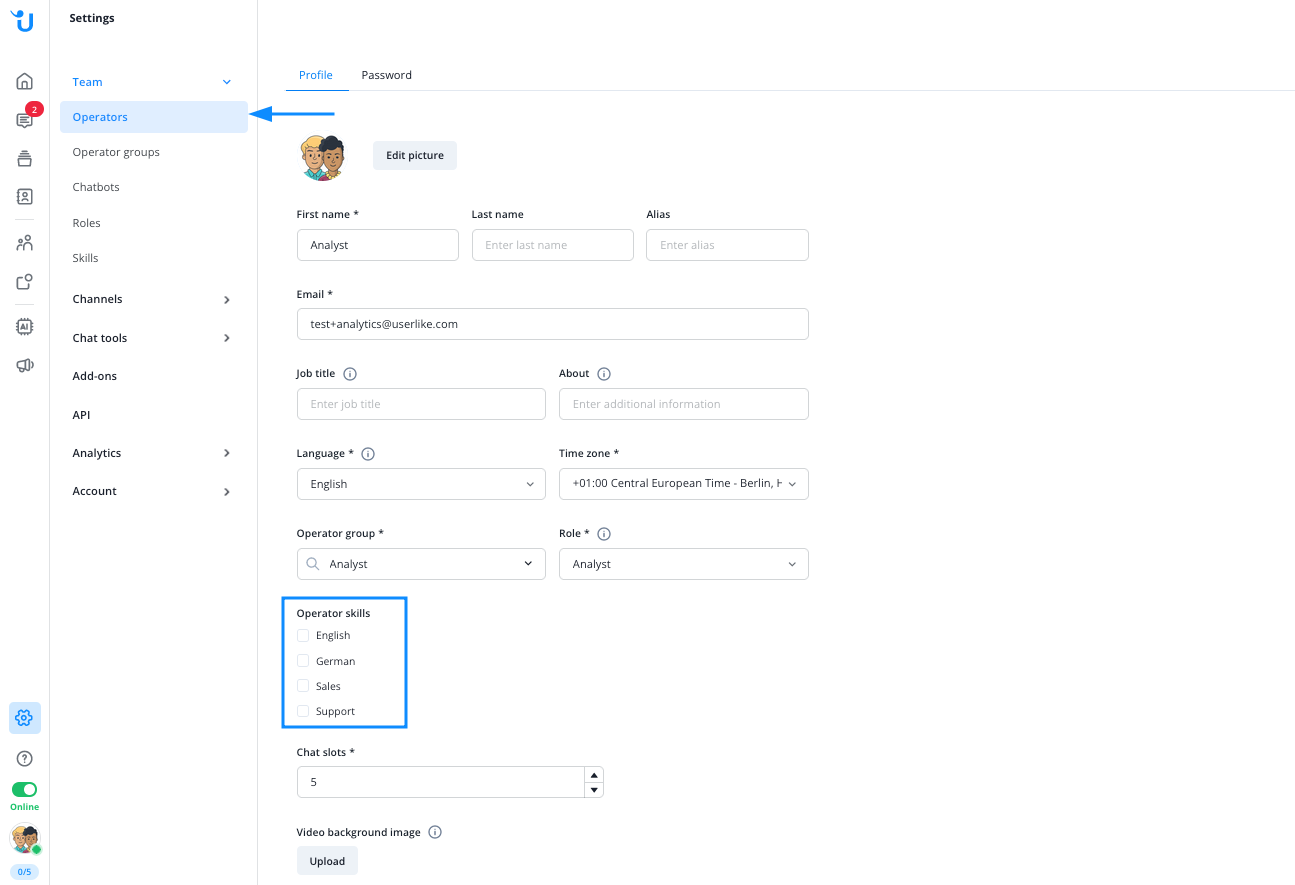
Back in the operator overview you see the updated operator with their assigned skills:
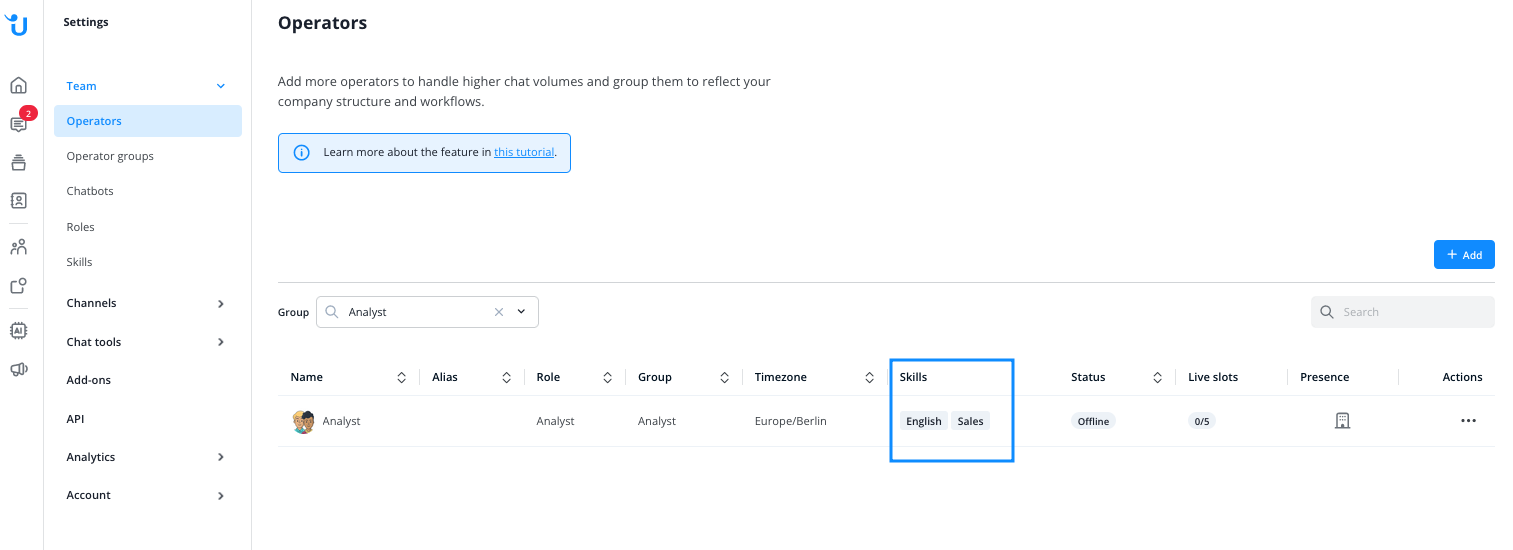
In the final step, configure a Widget to use the Skills routing mode. Go to Channels > Website and select a Widget to edit, then enter the routing settings under Chat > Routing.
Set the Routing mode to Skills and add an empty skill set by clicking Add skill set. Now assign the set some of the previously configured skills from the Add skill dropdown menu.
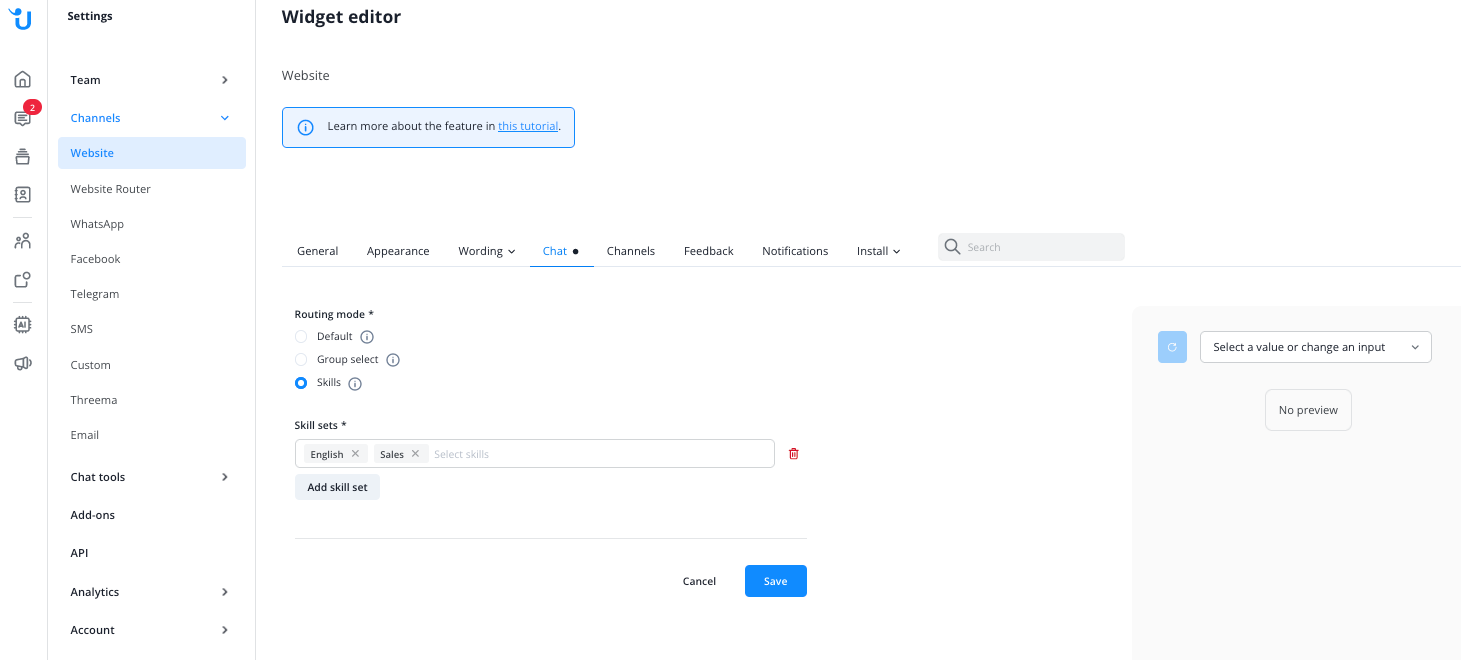
A skill set can consist of one up to as many skills as you like and you can add multiple sets to your routing setup. You can also remove skills and skill sets.
Remember that in order for operators to receive conversations via a Widget with Skills routing enabled, they have to match at least one of the defined skill sets completely (possess all its skills). If you create sets with too many skills you might not have enough operators to sufficiently staff your Widget.
Use Cases
The Skills routing mode is a good match...
- if you have a large team of operators with many different abilities. Instead of modelling a static structure via operator groups (e.g. your team structure, or your support topics) and connecting those permanently to a Widget, with skills you can precisely describe the type of operator who is able to serve contacts on this Widget.
- basically anytime you wish you could put an operator into two different operator groups. You have a small team, so your sales and support staff should also handle some of the general requests while still being available for their speciality topics? Create a Widget that only requires a certain language proficiency, as well as two Widgets that require the respective other skills in their skill set. Then integrate the Widgets on the respective parts of your site.
read this article in English:
https://docs.userlike.com/setup/widget-setup/chat-routing
